Takeout cravings tend to show up on the busiest nights, and delivery chicken often arrives soft and swimming in syrup. This Sesame Chicken fixes both problems. You get crisp, lightly coated bites in a honey-soy glaze with enough rice vinegar to keep it from tasting like candy.
Plan on 20 minutes of prep and 25 minutes of cooking, and you’ll have 4 servings. The method uses one simple coating: an egg wash, then a flour-and-cornstarch dredge. It fries up golden in a Dutch oven and holds its crunch through the sauce toss.
Good to know: cornstarch fries crisper than flour alone, and the flour gives the coating enough body to grip the glaze.
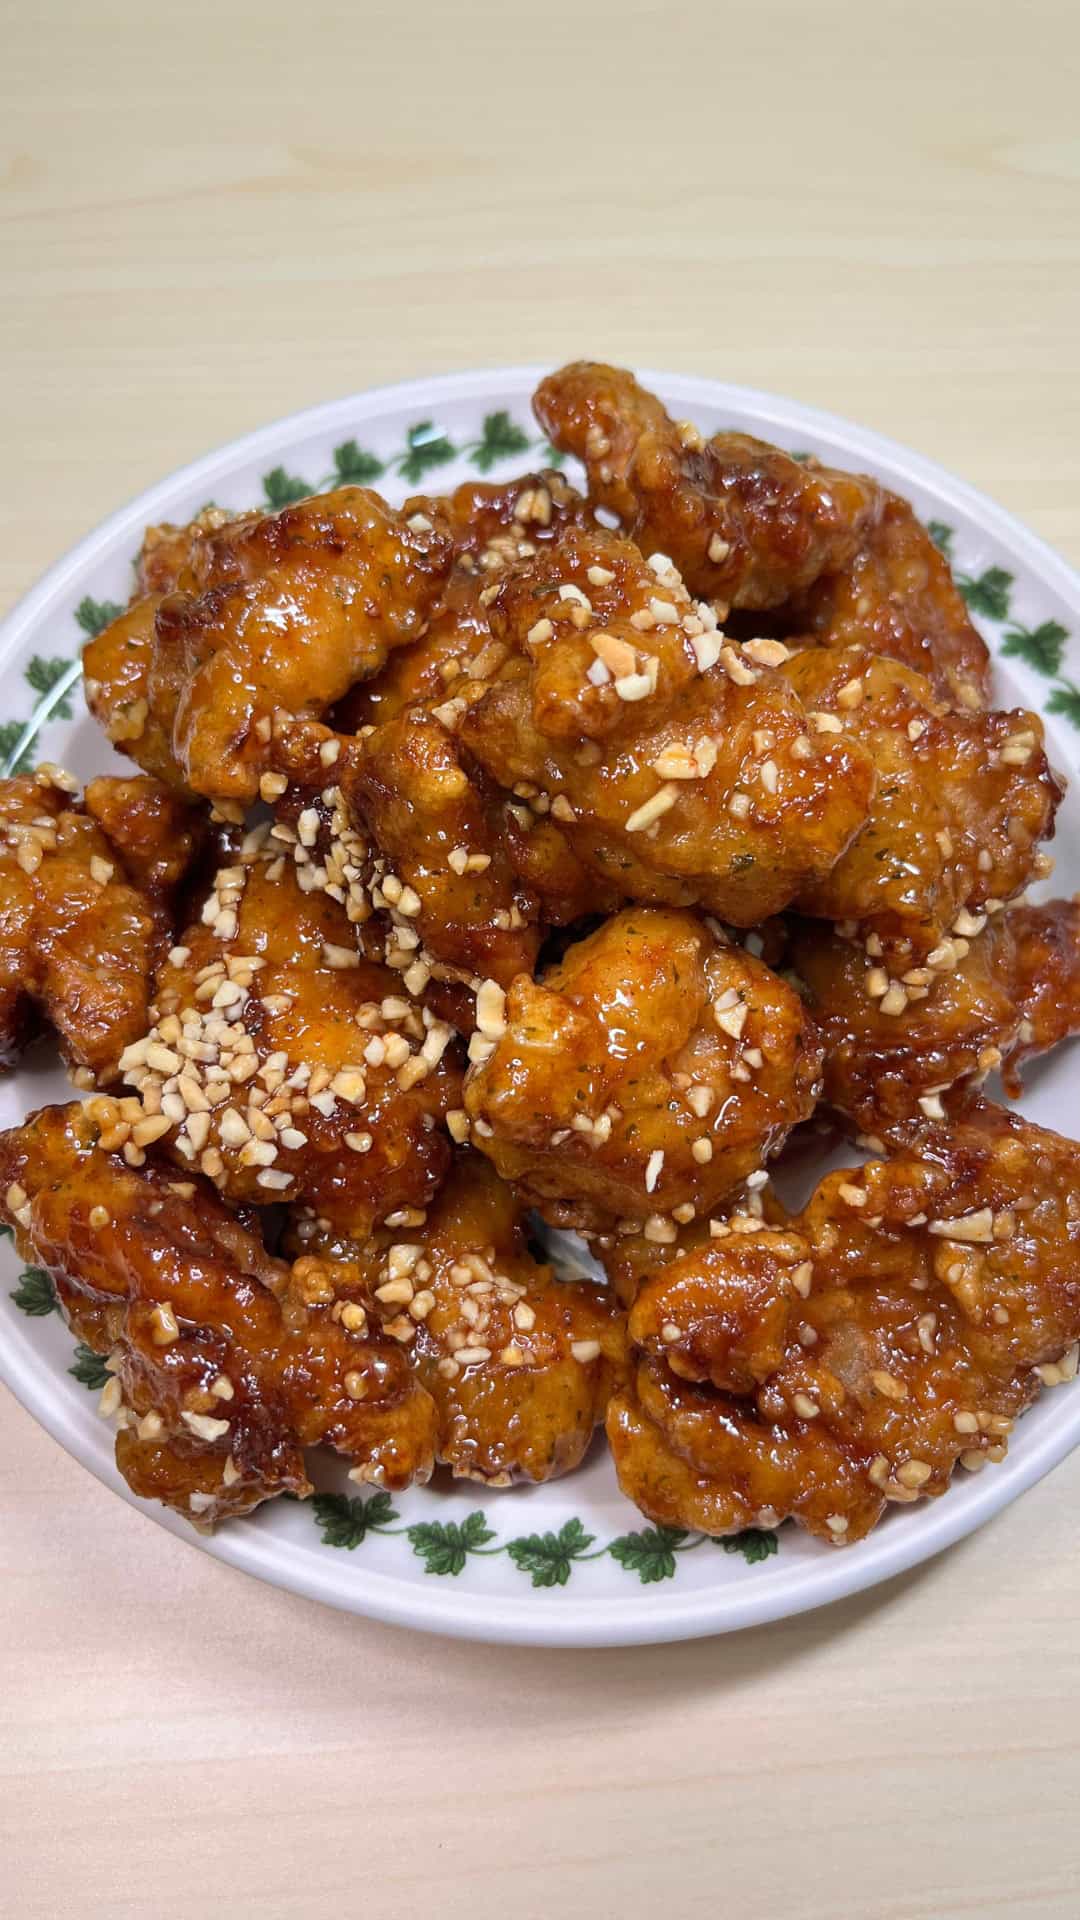
Why You’ll Love This Sesame Chicken
This version gives you more chicken and less batter, plus a sauce you control. Here’s what makes it worth the frying:
- A coating that stays crisp. The egg-then-dredge method builds a thin shell that crackles when you bite it.
- Balanced glaze. Honey and brown sugar bring the sweetness, and rice vinegar plus soy sauce pull it back toward savory. It tastes like a honey sesame chicken without the sticky overload.
- Juicy meat. Thighs stay tender even if you fry them a minute too long.
- Pantry ingredients. Nothing here needs a specialty store trip.
- Fast once it starts. The sauce simmers in about 2 minutes while the last batch drains.
- Easy to riff on. The same frying setup works for orange chicken, so this sesame chicken recipe teaches you a technique you’ll reuse.
How to Make Sesame Chicken
Learning how to make sesame chicken comes down to two jobs: fry the chicken hot and in small batches, then build a glaze that coats a spoon without turning gluey. Get your sauce mixed and your coating station set up before any oil heats. Once frying starts, things move quickly.
Chicken thighs are the better pick here because their extra fat keeps them moist through frying. Chicken breast works too; see the substitutions section for the timing change.
Ingredients
Yield: 4 servings. Listed in the order you’ll use them.
For the chicken:
- 1 1/2 pounds [680 g] boneless, skinless chicken thighs, cut into 1-inch pieces
- 1 large egg
- 1 tablespoon [15 ml] low-sodium soy sauce
- 1/2 cup [64 g] cornstarch
- 1/4 cup [31 g] all-purpose flour
- 1/4 teaspoon [1.5 g] fine salt
- 1/4 teaspoon [0.5 g] ground white or black pepper
- 6 cups [1.4 L] neutral frying oil (canola, vegetable, or peanut)
For the sauce:
- 1/2 cup [120 ml] water
- 1/4 cup [60 ml] low-sodium soy sauce
- 3 tablespoons [63 g] honey
- 2 tablespoons packed [27 g] brown sugar
- 2 tablespoons [30 ml] rice vinegar
- 1 tablespoon [8 g] cornstarch
- 2 teaspoons [10 ml] toasted sesame oil
- 1 teaspoon [5 ml] neutral oil
- 3 cloves garlic, minced [9 g]
- 1 teaspoon fresh ginger, grated [5 g]
For finishing:
- 1 tablespoon [9 g] toasted sesame seeds
- 2 green onions, thinly sliced [30 g]
Keep the two oils straight. Neutral oil handles the high-heat frying. Toasted sesame oil is for flavor only and burns fast, so it goes into the sauce.
Equipment
- 5.5-quart Dutch oven or a 14-inch wok for frying. Heavy pots hold their temperature better when cold chicken goes in.
- 12-inch skillet for the sauce, roomy enough to toss all the chicken at once.
- Instant-read or clip-on thermometer
- Spider strainer or slotted spoon
- Rimmed half-sheet pan fitted with a wire rack
- 2 medium bowls and 1 small bowl for the sauce
Step-by-Step Instructions
Sesame chicken works like good fried chicken: dry surface, hot oil, room in the pot. The glaze goes on in the last minute so the crust doesn’t steam.
Step 1: Prepare the Chicken and Mix the Sauce
- Pat the chicken pieces dry with paper towels. Wet surfaces make the coating slide off.
- In a medium bowl, whisk the egg and 1 tablespoon soy sauce. Add the chicken and toss until every piece is glossy.
- In a small bowl, whisk the water, 1/4 cup soy sauce, honey, brown sugar, rice vinegar, 1 tablespoon cornstarch, and toasted sesame oil until no cornstarch lumps remain. Set the garlic and ginger next to the stove.
Step 2: Coat the Chicken
- In a second medium bowl, whisk the 1/2 cup cornstarch, flour, salt, and pepper.
- Lift the chicken from the egg a few pieces at a time, letting extra drip off, and press each into the dredge. Shake off the loose powder; clumps of dry flour fry up raw-tasting.
- Set coated pieces on the wire rack and let them sit 5 minutes while the oil heats. The coating turns slightly damp and paste-like, which helps it cling during frying.
Step 3: Fry in Small Batches Until Golden
- Pour the neutral oil into the Dutch oven (about 2 inches deep) and heat over medium-high to 350°F [177°C], about 8 to 10 minutes.
- Fry one-third of the chicken at a time, roughly 10 to 12 pieces. You’ll hear a steady, lively sizzle; if it drops to a weak bubble, the pot is crowded or the oil has cooled.
- Cook 5 to 6 minutes, turning once, until deep golden and crisp at the edges. The thickest piece should read 165°F [74°C] inside.
- Move the chicken to the rack, never onto paper towels, and let the oil return to 350°F before the next batch.
Step 4: Simmer the Sauce Until Glossy
- Heat 1 teaspoon neutral oil in the 12-inch skillet over medium heat. Add the garlic and ginger and stir 20 to 30 seconds, just until fragrant and before they brown.
- Re-whisk the sauce (the cornstarch settles) and pour it in. It turns from cloudy to clear and bubbles within 1 to 2 minutes.
- Simmer until it coats the back of a spoon and a finger swipe leaves a clean line. That spoon-coating stage is your target; more time makes it gummy. If you want a bigger batch to keep in the fridge, this sesame chicken sauce scales up well.
Step 5: Toss, Garnish, and Serve Immediately
- Turn off the heat. Add all the fried chicken and toss with a spatula for about 30 seconds until every piece shines.
- Scatter the toasted sesame seeds and green onions over the top.
- Serve right away. The crust stays crisp for about 15 minutes in the glaze, then starts to soften.
Tips and Tricks
Most sesame chicken problems come from two places: a soggy crust or a sauce that’s too heavy. These fixes target both.
How Do You Keep the Coating Crisp?
- Don’t fry cold, wet chicken. Pieces straight from a puddle of egg drop the oil temperature fast. Let the extra drip off for a few seconds and rest coated pieces 5 minutes.
- Fry in thirds, every time. Dumping half the chicken into a 5.5-quart pot sends 350°F oil down near 300°F, and the coating soaks up grease instead of setting.
- Drain on a rack. Paper towels trap steam under the chicken and soften the bottom.
Why this works: a crust stays crisp when its moisture cooks off fast, and hot oil, small batches, and open-air draining all speed that up.
- Double-fry if you’re serving late. After all three batches, rest the chicken 5 minutes, then fry everything again at 350°F for 2 minutes. It adds about 10 minutes but buys more crunch time on the table. Skip it on a busy night; the dish is still good.
- Toast your own sesame seeds. Raw white sesame seeds taste flat. Stir them in a dry 8-inch skillet over medium heat for 3 to 4 minutes, until light tan and nutty-smelling, then pour them onto a plate so they stop cooking.
If you like this kind of crunch, Chinese chicken fingers use the same frying instincts in a bigger cut.
How Do You Fix Sauce That’s Too Thick or Too Sweet?
Thick sauce is the usual failure. Here’s the common version: the glaze simmers 4 minutes while you finish frying, and it sets into a stiff paste that clumps on the chicken. Fix: whisk in hot water 1 tablespoon at a time over low heat until it runs off a spoon in a slow ribbon again, usually 2 to 3 tablespoons.
- Thin sauce that won’t coat? Mix 1 teaspoon cornstarch with 1 tablespoon cold water and stir it into the simmering sauce. It thickens within 30 seconds. Never sprinkle dry cornstarch in, or you’ll get lumps.
- Too sweet? Add 1 teaspoon rice vinegar plus 1/2 teaspoon soy sauce, taste, and repeat once if needed. Acid and salt cut sweetness faster than extra water does.
- Sesame oil tasting bitter or harsh? It went in too early or got too hot. Keep it in the sauce mixture, which never goes above a simmer, and never use it as frying oil.
Ingredient Substitutions
Most swaps here are easy as long as you adjust timing or watch for allergens.
Chicken, Coating, and Allergen-Aware Swaps
- Chicken breast for chicken thighs: use the same 1 1/2 pounds [680 g]. Cut into 1-inch pieces and fry 4 to 5 minutes; breast dries out quickly past 165°F [74°C].
- Cornflour: if your recipe source is British, cornflour is the same thing as US cornstarch. Swap 1:1.
- Gluten-free coating: replace the 1/4 cup all-purpose flour with 1/4 cup [40 g] white rice flour. Use tamari in place of soy sauce in both the coating and sauce. Check that your rice vinegar is plain, since seasoned versions add sugar and salt. Wheat warning: regular soy sauce contains wheat.
- Egg-free: skip the egg and toss the chicken with 1 tablespoon soy sauce plus 2 tablespoons water. Then dredge. The crust comes out thinner and a little patchier.
- Lighter, puffier crust: add 1/2 teaspoon baking powder to the dry dredge. Fry right after coating so the bubbles don’t fade.
Allergen note: this dish contains sesame (seeds and oil), soy, wheat, and egg. For a sesame allergy, leave out both the seeds and sesame oil, and call it honey-soy chicken; the honey garlic chicken flavor profile is a close cousin.
Sauce Alternatives and Optional Flavor Adjustments
None of these are required. Use them if you have them.
- Light soy sauce: use it 1:1 for low-sodium soy sauce, but cut the coating soy to 2 teaspoons, since light soy is saltier.
- Dark soy sauce: add 1/2 teaspoon to the sauce for deeper color and a mild molasses note. More than that turns it bitter.
- Oyster sauce: stir in 1 tablespoon [18 g] and reduce the soy sauce by 1 tablespoon. It adds savory depth. Shellfish warning: oyster sauce is made from oysters.
- Shaoxing wine: add 1 tablespoon [15 ml] to the sauce for a rounder, slightly boozy aroma. Dry sherry swaps 1:1. Shaoxing contains wheat and salt.
- Chinese rice vinegar: swap 1:1 with any plain rice vinegar. Apple cider vinegar also works 1:1, with a fruitier edge.
- Paprika: 1/2 teaspoon in the dredge gives a deeper golden color. It won’t make it spicy; for heat, add 1/4 teaspoon red pepper flakes to the garlic.
- Spring onions are the same as green onions. Shallots or chives work in a pinch.
What to Serve With Sesame Chicken
Steamed rice is the classic pairing because it soaks up every drop of glaze. Pair it with one green vegetable and you have a full meal.
- Steamed jasmine rice. Rinse 1 1/2 cups [280 g] rice until the water runs mostly clear, then cook with 2 1/4 cups [530 ml] water. Start it before you heat the oil.
- Steamed broccoli. Steam 1-inch florets 4 to 5 minutes until bright green and just tender. Its slight bitterness cuts the sweet sauce.
- Fried rice. Day-old rice fries best because it’s drier. Keep it light on soy, since the chicken is already well seasoned.
- Smashed cucumber salad. Rice vinegar, a pinch of sugar, and a few drops of sesame oil. Cold and crunchy next to hot chicken.
- Garlicky bok choy. Halve baby bok choy and stir-fry 3 minutes with garlic.
- Dumplings or potstickers on the side, with a sharp dim sum dipping sauce for contrast.
- Lo mein noodles tossed with a little soy sauce, if rice feels repetitive.
Serving tip: toss and plate the chicken last, after the rice and vegetables are ready, so it hits the table at peak crunch.
How to Store Sesame Chicken
Leftovers keep well for safety, but sauced chicken softens in the fridge no matter what you do. Storing the chicken and the glaze apart gives you the best second-day texture.
Room-Temperature, Fridge, and Freezer Limits
- Room temperature: refrigerate within 2 hours of cooking, or within 1 hour if your kitchen or outdoor space is above 90°F [32°C].
- Fridge: store in airtight containers for 3 to 4 days. If you planned ahead, keep unsauced fried chicken in one container and extra sesame chicken sauce in a small jar.
- Freezer: freeze unsauced fried chicken in a single layer on a sheet pan, then transfer to a freezer bag. Best quality within 2 months. Already-sauced leftovers freeze safely for the same window, but the coating thaws soft.
Thaw frozen chicken overnight in the fridge before reheating. Leftover pieces that have gone soft are great chopped into an Asian chicken salad, where crunch comes from the greens instead.
How to Reheat Without Making the Coating Soggy
The oven or air fryer brings back the most crunch; the microwave is fastest but leaves the crust chewy.
- Oven: heat to 400°F. Spread the chicken on a wire rack set in a sheet pan and bake 8 to 10 minutes, until it sizzles and reads 165°F [74°C] in the center.
- Air fryer: 375°F for 5 to 7 minutes, shaking the basket once.
- Sauce: warm it separately in a small saucepan over low heat for 2 to 3 minutes, adding 1 to 2 teaspoons water if it has set into a gel. Toss with the hot chicken right before eating.
- Already-sauced leftovers: reheat in a 12-inch skillet over medium-low heat, covered, for 5 to 6 minutes with 1 tablespoon water, stirring once, until 165°F. Expect soft, sticky chicken; it still tastes good.
For a reheat-friendly glazed chicken with no frying, sticky honey chicken holds up better on day two.

Crispy Sesame Chicken Recipe

Equipment
- 5.5-quart Dutch oven or 14-inch wok
- 12-inch skillet
- Instant-read or clip-on thermometer
- Spider strainer or slotted spoon
- Rimmed half-sheet pan with wire rack
- 2 medium bowls
- 1 Small bowl
Ingredients
- 1 1/2 pounds 680 g boneless skinless chicken thighs, cut into 1-inch pieces
- 1 large egg
- 1 tablespoon 15 ml low-sodium soy sauce
- 1/2 cup 64 g cornstarch
- 1/4 cup 31 g all-purpose flour
- 1/4 teaspoon 1.5 g fine salt
- 1/4 teaspoon 0.5 g ground white or black pepper
- 6 cups 1.4 L neutral frying oil
- 1/2 cup 120 ml water
- 1/4 cup 60 ml low-sodium soy sauce
- 3 tablespoons 63 g honey
- 2 tablespoons packed 27 g brown sugar
- 2 tablespoons 30 ml rice vinegar
- 1 tablespoon 8 g cornstarch
- 2 teaspoons 10 ml toasted sesame oil
- 1 teaspoon 5 ml neutral oil
- 3 cloves garlic minced (9 g)
- 1 teaspoon fresh ginger grated (5 g)
- 1 tablespoon 9 g toasted sesame seeds
- 2 green onions thinly sliced (30 g)
Instructions
- Pat chicken dry, then toss with the egg and 1 tablespoon soy sauce. Whisk water, 1/4 cup soy sauce, honey, brown sugar, rice vinegar, 1 tablespoon cornstarch, and sesame oil for the sauce.
- Whisk 1/2 cup cornstarch, flour, salt, and pepper. Dredge chicken, shake off excess, and rest on a wire rack for 5 minutes.
- Heat 2 inches of neutral oil in a 5.5-quart Dutch oven to 350°F (177°C). Fry chicken in 3 batches for 5 to 6 minutes until golden and the internal temperature reaches 165°F (74°C). Drain on the wire rack.
- In a 12-inch skillet over medium heat, cook garlic and ginger in 1 teaspoon oil for 20 to 30 seconds. Add the re-whisked sauce and simmer for 1 to 2 minutes until it coats a spoon.
- Turn off the heat, toss in the chicken for 30 seconds, top with sesame seeds and green onions, and serve immediately.
